
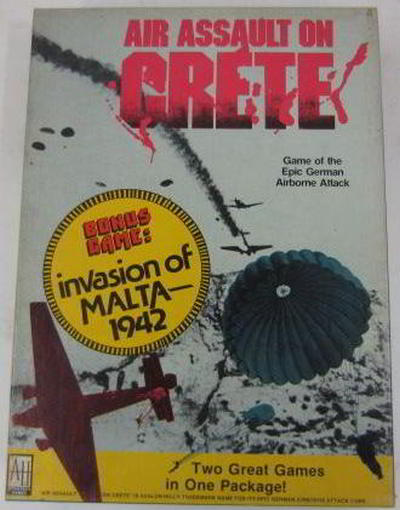
Air Assault on Crete endeavors to recreate the German’s audacious attempt at the theretofore unattempted, an entirely airborne military invasion by several battalions of Fallschirmjaeger, and the fighting retreat and evacuation of Allied personnel in the aftermath.
This game is hard. Very hard. Part of why it is hard is because it is rules heavy even for a wargame, but it is doubly so because it is so different from most war games I’ve played. This difficulty is a bit asymmetrical, as many of the special rules apply only to the German player (such as conveys, paratrooper drift and air power) but you’ll find in the options of the advanced game plenty of fiddly bits to keep the Allied player scratching their head and checking the rulebook. You also can’t bring with you any mechanical assumptions you may have based on other similar wargames because so many of those assumptions would be wrong in the case of Air Assault on Crete.
In several games, fog of war rules may be limited or optional, but I can’t imagine the Allies having a chance in this without the facedown setup. The Germans have to land, take and hold at least one of the three air bases at Maleme, Heraklion and Retimo. In the basic game, the Allies win by preventing this (an almost impossible task). In the advanced game, the Allied player wins by putting up a decent fight and successfully evacuating a sizable portion of their forces. The fog of war effect is continuous throughout the game, in that any Allied units that are not adjacent to German forces or actively being targeted by German bombardment are kept face down. This allows the Allied player to mask his strength and shuffle non-combat units to evac points, but can sometimes be a bit of a hassle, as one will constantly be checking their piles for AA units and defensive artillery anytime anything happens.
The array of non-combat units in this game is unlike anything I’ve ever in a war game, with several pieces sending my dad and I to lists of Nato Symbols to figure out what’s what. The British have hospitals, dock workers, signal corps, police, military police, fixed wing technician crews, transport, and ordinance crews which all take up valuable stacking space, have no combat strength and exist only to count towards your evac score if you can get them off the island. Weak and easily eliminated as these are, they are what wins the game for the Allies. Of course I made the mistake of allowing some of these units to be isolated behind my lines, which meant easy pickings for Germans. I’m hoping I have enough left around for the evac.
In our first session, we’ve managed to knock out about 8 turns, so the play is fairly quick. My dad took the Maleme airfield fairly early on, making the primary Allied victory unfeasible, and has been able to begin flying in reinforcements. I’ve been stalling the German troops pretty well in the area between Khania and Galatas to cover the movement of troops from Suda down the road toward Sphakia. The situation in Heraklion and Retimo are up in the air, but my dad’s mistake in sending the relief convoys too early may keep Retimo in my hands long enough to cover the evacuation.
There are many things about Air Assault on Crete that are so unlike any war games I’ve played that I keep having to look back at the manual and go “Really? That’s really how that works?!”
In almost every game I’ve played featuring zones of control, entering or remaining in an enemy zone of control means you are committed to combat. Not so in Air Assault. Units are NEVER required to engage in combat. That is a HUGE deal for defenders. Defenders ALWAYS have the combat table advantage in war games, but in many games, the defender is forced to surrender favorable terrain so as not to be forced to make a suicidal counter attack. In Air Assault on Crete, defenders can hold up against several units without having to withdraw from hilly terrain or cities, significantly slowing down the attacking player. In many games a surrounded unit not only has to attack, but it must attack ALL adjacent enemies. Air Assault allows for the defenders to attack only one adjacent hex, no matter how many other adjacent hexes are occupied. This allows the defending player to whittle away at the attackers while being surrounded.
So, what DO the Zones of Control do, if they don’t force combat? They primarily affect movement and retreat, but in a few neat and unexpected ways because of the lack of a requirement to attack. Units cannot move out of one Zone of Control into another. Except when they can. Depending on the time of day and the unit’s mobility, units may move from one ZOC to another or ignore them completely. And while, like most games, retreating into a hostile ZOC causes unit elimination, however a retreating unit CAN retreat into a hex with a friendly unit even if that unit is in an enemy ZOC. Where this gets dicey is the stacking limit: a unit can retreat into a friendly occupied hex <em>that is being attacked</em>; it will not contribute to the defense strength of the units being attacked, will suffer the same combat results AND stacking limits must be obeyed. This can create some really interesting choices for the retreating player. I had two hexes along the coast being attacked, both at 1 to 1 odds; the first attack was being made against a much stronger hex with two British infantry battalions and the second against an HQ and a company. My dad’s first attack got a really lucky roll and forced the two battalions to retreat; the only legal retreat path they had was into the adjacent hex being attacked. Retreating into the other hex would overstack it, and if both battalions moved into the hex, it would eliminate the other defenders, changing the 1-1 odds to 9-1. Rather than lose both battalions of British Regulars, I took a gamble, sacrificed a unit in the other hex so that at least one battalion could escape and defend against 2-1 odds instead of 1-1. My gamble paid off, and in the end, I lost one battalion and a company HQ instead of two full strength battalions.
The other aspect of Air Assault that is very different from many non-PC wargames I’ve played is defensive artillery fire. While most games either have some sort of bombardment table for artillery or have artillery contribute to attacking odds, Air Assault allows the player to target single or multiple (within a hex) attacking units BEFORE the attacking player declares final odds. Knocking out just one company or platoon of attacking Luftwaffe can shift the odds from the solid 3-1 column to the much iffier 2-1 column.
I may have made it sound like things may be stacked in favor of the defenders. That is not the case at all. The German player really has their work cut out for them, it’s true, but the bulk of the Allied forces stationed on Crete are poorly equipped and poorly trained. For every full strength British or New Zealander infantry battalion, there are probably half a dozen understrength and non-combat unit. Many of the Allies, particularly the Greek forces, on Crete were not adequately armed, with a shortage of guns creating an issue for the defenders all across the island. To represent this, many of the Allied pieces are considerably understrength (battalions with the fighting capability of a company or platoon) and have high stacking values (3 or 4, where maximum stacking per hex is 6). These large but poorly equipped units often end up only getting in the way, because they often cannot stack with stronger units to contribute their inconsiderable defensive value to key locations. At best, they are cannon-fodder, which can slow down the German Stormtroopers for a turn, making a desperate stand to let other units get away.
Lastly, Exchange combat results are flexible. Normally, an exchange results in each side losing one unit that was involved with combat. Here, the attacker has the option to essentially sacrifice units to force higher casualties on the defender, which is kind of cool.
It is rather unfortunate that it was not until well after I had set-up and that I had time to take home, read and study the Air Assault on Crete instruction manual and tactics guide which states that the game may very well be decided entirely upon the initial setup. Crap, I may have already lost! In his magnanimity, my dad loaned me his 1978 issue of The General featuring various strategies for Air Assault on Crete, but I haven’t the chance to give them more than a quick look, so I’ll just give a brief on the lessons learned from the initial setup and early turns:
Allied Player
- Keep non-combat units with combat units on setup. It may spread your first turn defense strength a bit thinner in certain hexes, but it’s far better than losing a stack of units and hurting your chances of winning in the evac scenario.
- Set up AA with the German drop zones in mind. Even if it makes sense for your AA guns to be on your airfields, it really is better to put them where they can force a greater drift for landing paratroopers.
- Prepare for evacuation on Turn 1. Aside from the mistakes that led to an early loss of a few non-combat units, I’ve done pretty well on this one. By the time you are allowed to begin evacuating troops, if you’ve been moving them towards Sphakia since turn one, you’ll have most of your non-combat troops safely on their way and well out of reach of German troops.
- Keep to cities and high ground. Rules that would normally force defenders out of advantageous terrain are not in place in here. Even weaker units can pose a problem for the German advance if they’re doubled by hills or cities or force the attacker to take a penalty by attacking across a riverbed.
German Player
- Negate enemy terrain bonus by taking advantage of not being forced to attack. You only need to take one airfield to win and avoiding excessive casualties will prevent an Allied evac victory. I think that if you avoid being bogged down against scrubs holding hilltops, valleys and particularly Galatas, you can make this an easy victory. If you can’t attack at decent odds, the Allies certainly won’t be able to do any better unless they can isolate companies.
- Don’t send your relief convoys too early. My dad sent both of his relief convoys for the amphibious assault very early in the game. Because the paratroopers hadn’t secured any of the landing areas, in the end, very few units actually arrived. Part of the first convey aborted (historically, the British Navy dispersed the two amphibious relief groups around May 22nd), but the second convey was completely destroyed because my dad hadn’t taken out the Coastal Artillery around Retimo first. I think your best bet is to wait until the second half of the game to send your convoys. By then, all coastal defenses should be neutralized, and the German player may even have a port which will significantly reduce the chance that a convoy will be aborted or destroyed. Allied evac victory hinges in part upon the number of Nazi units killed; sending troop transports up against coastal batteries give the Allies freebies.
Despite the complexities, this game has played quickly. That is a good thing, because I think I’d need to play this through several times to get a grasp on optimum strategies and counter strategies. We might get one more play out of this one before moving on. I’d put this on the intermediate to advanced scale. While options exist for simplified play, I just don’t see the Allied player having much of a chance to win without the optional evacuation victory. Some players may also be turned off by the lack of force mobility; each theatre can do very little to support the others, and while there are a few things like air-lifts for the Germans and coastal steamers for the Allies, each of the three boards (Maleme/Suda, Retimo, and Heraklion) is like an isolated battle unto itself. Still, this game has a lot of neat gimmicks and solid mechanics that make it worth checking out.
– Alex
If you like it at all be sure to try the Malta scenario. I found that to be even better than Crete.