
 As follow ups to NATO: The Next War In Europe, my dad and I broke out two VERY different WW3 game to try out.
The first was The Red Storm. This game simulates the first big push into West Germany and towards the Low Countries and France’s border, though it does so on a much more tactical scale than NATO.
The components and map were both very well made, sturdy and incredibly colorful, though the different sizes of particular pieces and disruption counters sometimes made stacking a bit of a challenge.
In our one play-through, I played as NATO and actually had a lot of fun. I may have felt differently had I played as Warsaw Pact, but the number of defensive and offensive options available to the NATO player throughout the turn allowed for a lot of different tricks and stratagems to try out.
The turn looks something like this:
- Warsaw Moves
- NATO fires assault breaker rockets & sends in attack helicopters
- Warsaw Fires their artillery
- Both sides allocate planes
- Warsaw Attacks
- Warsaw Mech gets secondary movement
- NATO Moves
- NATO can attack w/unused assault breakers and helicopters
- NATO Attacks
- NATO mech secondary movement
A lot of the fun playing as NATO comes from deciding when and where to use your assault breakers and helicopters to foil the massive attacks of Soviet tanks on the move.
Combat in Zones of Control is mandatory, but there is no combat following the mechanized secondary movement phase, so the NATO player will have a lot of shuffling light mech units and tanks, pulling back and then using the secondary movement to wheel around to stop up gaps. Breakdown units can further slow the Soviet advance by sacrificing defensive strength for delays and tactical depth (The Red Storm has only 7 turns).
Almost all combat results in some level of disruption. Where Red Storm mixes things up a bit is by having disruption resolved by phase – disruption incurred during the WP player’s phase is removed during the following WP player’s phase, and disruption incurred during NATO player’s phase is removed during the following NATO player’s phase. Most of the counters are going to be during the WP player’s phases, because if the NATO player is doing a lot of attacking on his turn, he’s probably doing it wrong.
We managed to finish this entire game without delving into the nuke rules, so I can’t really comment on those, other than to say that if my dad had nuked me, I might have lost. Even with my big tactical wins early on, by the on, I was still spread pretty thin and it became a question of which units I was willing to sacrifice to prevent or reduce WP tactical gains. Mechanized secondary movement meant that any breakthrough could be rapidly exploited, and once the Soviet armor gets out of the forests of West Germany, there’s really nothing to stop them except for whatever late-game scrubs the French can muster up.
I’ve made it sound like the game was great and loads of fun, and it was, but there was a significant point of friction that made the entire thing incredibly frustrating to play.
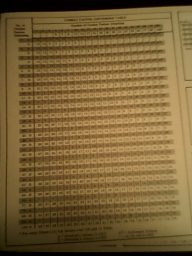
This is not the combat results chart. This is the chart you roll on to determine which columns of the combat results chart to roll on.
I have never played a game with more granular combat resolution.
You compare the attacking and defending strengths of the units involved in combat, matching them up using this chart. This tells you the baseline of which of the 30-odd combat results column that the attack and defender each roll on; once you make assorted adjustments for terrain and figure out the correct columns to roll on, each player rolls a d10 (yes, the game is d10-based) to determine the results.
The results include a wide range and combination of results:
- withdrawing (owning player choses path)
- retreating (opponent chooses path)
- various degrees of disruption (halving movement, halving attack, halving defense)
- elimination
The biggest annoyance was that the two tables needed for combat were on opposite sides of the same player-aid, of which there was only one. So, every combat had us flipping and checking, flipping and checking, flipping and re-checking.
Make yourself a photocopy of these if you want to play this.
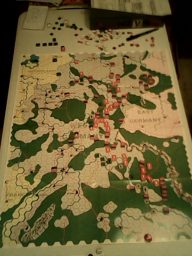
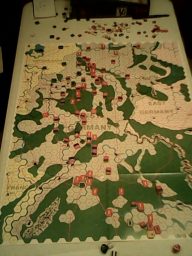
I did manage to get some snapshots of how our game played out.
These first two include the beginning and end of turn two. As you can see, many pieces are covered by the split red and blue counters, making it difficult to see who they belong to. This was nowhere near as bad, however, as in the next game we played, The Hoff Gap (part of the Central Front series).
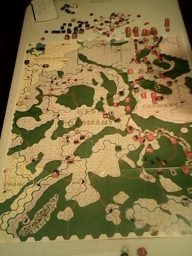
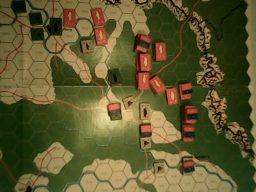
I’d pulled back the southern flank, where the Soviet turn 2 reinforcements came through.
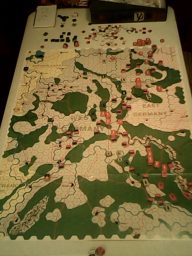
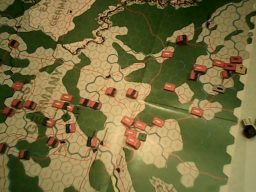
Here are a few pictures of the start of the final turn. As you can see, while I kept the soviets bottled up in the center and in the south, there are holes starting to form, particularly in the north.
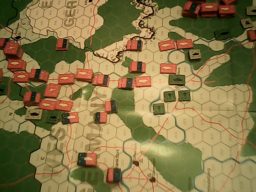
Here is a close-up of the tactical situation in the south; as you can see, those big piles of soviet tanks are disrupted from my assault breakers; those three grey squares down the center are a breakdown unit of mountaineers that are trying to keep the tanks from breaking through anywhere.
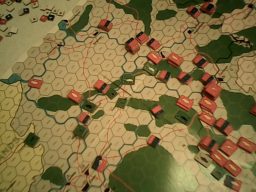
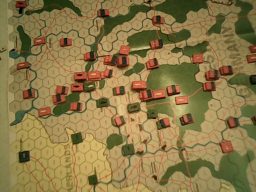
The situation was more dire in the center, as you can see here. The French are coming up the road, but the 82nd Airborne along that river and the armor to the north are all that’s keeping a final turn break-out from occurring. Those two disrupted units in the center are my light tanks minding gap.
In the north, I refused my flank and kept moving the 101st airborne around to make sure no roads ever stayed open long enough for the Soviets to take advantage of wins in the cent. If the game went on for another turn, Warsaw would probably start pouring into the Netherlands.
As you can see, the Soviets made BIG gains that last turn, but I managed to hold them back and stave off defeat. I’ve been pushed to the edge of the board in many places, and my line in the south has dissolved, but I managed to keep them from taking many of the critical victory cities.
The French infantry are arriving too late to do much. The 82nd is split and about to be wiped out; thank goodness the game is over!
The center is gone, but they bought enough time; the Pact failed to get nest of cities from Dortmund to Dusseldorf, which would’ve absolutely resulted in a complete Pact victory.
-Alex
It’s been decades since I played actual “true” wargames like this. Keep ’em coming.
Hello, any chance you could scan the rule book? I bought the game but it doesn’t have the rules.